3/4" Copper Water Service Pipe Repair – Clearwater, FL
In early December 2025, I was called to a home in Clearwater, FL to troubleshoot a hidden water leak inside an interior wall. The homeowner had noticed moisture and discoloration near a shut-off area, which is a common sign that a 3/4" copper water service pipe may be leaking behind the drywall. After safely shutting off the main water supply and protecting the work area, I began carefully opening the wall to locate the exact source of the leak.
Once the wall cavity was exposed, I found a significant pinhole leak in an aging section of copper pipe. Pinhole leaks like this are often caused by internal corrosion, water chemistry, and long-term pressure fluctuations in the plumbing system. If they are not repaired promptly, they can lead to water damage, mold growth, and structural issues inside the home. Using professional leak detection methods, I confirmed that the problem was isolated to a specific section of the water service line.
To correct the issue, I cut out the damaged copper and replaced it with a stronger, more durable piece of 3/4" copper pipe. I used a tubing cutter, deburring tool, and emery cloth to prep the pipe ends, then applied plumbing flux and soldered the new segment in place with lead-free solder. Proper soldering technique is critical in plumbing; the copper must be heated evenly so the solder flows smoothly into the joint, creating a long-lasting, watertight seal that can withstand full system pressure.
After the repair, I slowly restored water pressure and performed a thorough pressure test on the line to ensure there were no additional leaks. This type of professional copper pipe repair is essential for protecting the home, preventing water waste, and extending the lifespan of the plumbing system. The images below show different stages of the job, from opening the wall to exposing the copper line, to completing the final soldered repair.
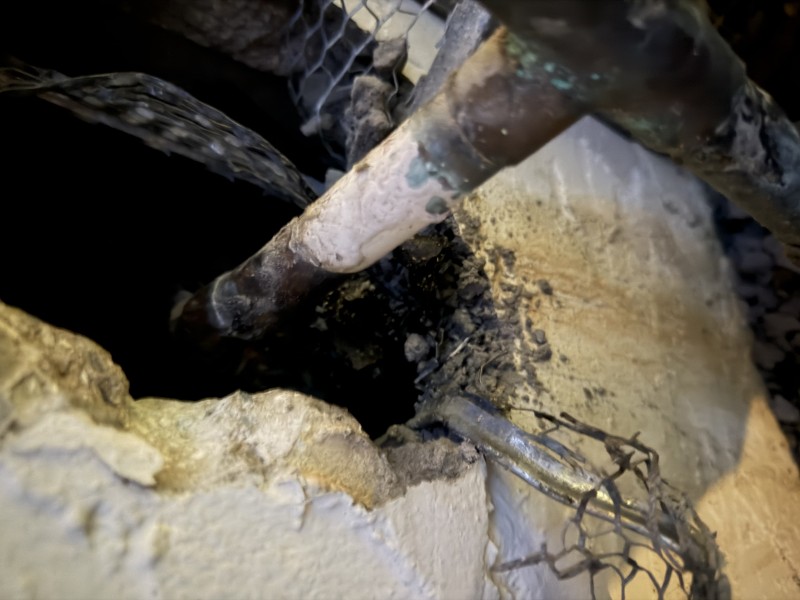
Opening the Wall to Access the Leaking Copper Pipe
In this stage of the job, I have opened the interior wall to expose the 3/4" copper water service pipe running behind the drywall. This allows me to visually inspect the plumbing for signs of corrosion, pinhole leaks, and previous stress on the line. Proper access is essential for accurate plumbing diagnosis and ensures that any cuts or repairs are made only where truly needed.
With the wall opened, I can safely work around other building components while locating the exact section of pipe that has failed. This helps prevent unnecessary damage to the home and makes it easier to perform a clean, code-compliant repair once the leaking copper section has been identified and marked for replacement.
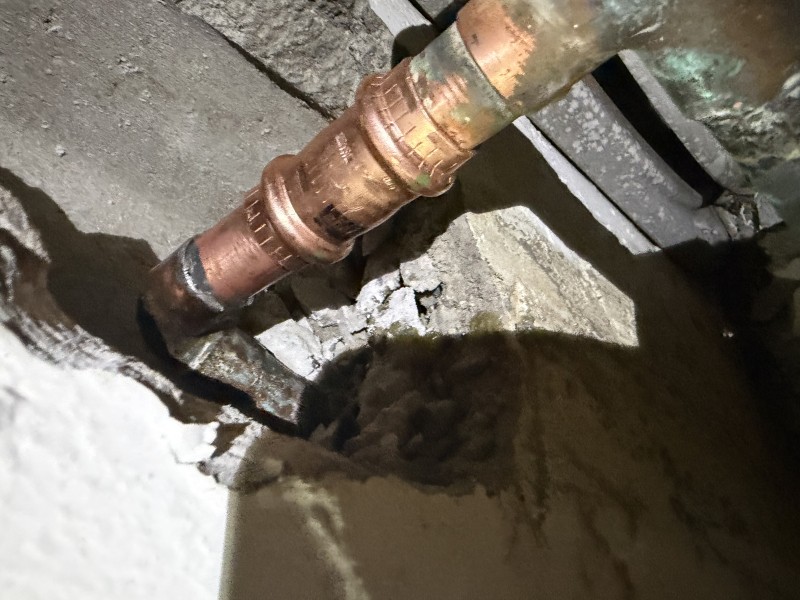
Installing and Soldering a Stronger Copper Pipe Section
Here, the damaged piece of copper has been removed and a new 3/4" copper pipe section has been installed in its place. The pipe ends have been cleaned with emery cloth, flux has been applied, and the joints have been carefully heated and soldered using lead-free solder. This process restores the integrity of the water service line and helps prevent future pinhole leaks in the repaired area.
After soldering, I allow the joints to cool and then bring the water system back up to pressure while checking for any signs of seepage around the new fittings. This final stage confirms a solid, watertight connection, completing the copper pipe repair and giving the homeowner a reliable, fully functional plumbing line behind the wall.