Bathroom Sink Leak Repair — Tampa, FL (September 2025)
Our licensed plumbers were dispatched to diagnose and repair an active leak beneath a bathroom sink in a busy commercial setting. Using proven troubleshooting steps—visual inspection, moisture detection, and dye testing—we isolated the failure at the drain assembly and restored a watertight seal the same day.
The repair involved replacing a compromised P-trap, inspecting compression nuts and slip washers, and verifying the integrity of the shut-off valves and flexible supply lines. We finished with pressure and flow tests to confirm no additional seepage, safeguarding the vanity base and subfloor from water damage.
Typical tools for this kind of service call include an adjustable wrench, slip-joint pliers, basin wrench, and a pipe cutter, along with professional consumables like thread seal tape, plumber’s putty, and silicone for final sealing. These industry-standard practices keep Tampa bathrooms draining properly and help prevent repeat leaks.
For ongoing reliability, we recommend periodic checks under the sink, monitoring for slow drains, and scheduling preventative maintenance—especially in high-use commercial bathrooms. Below are snapshots from the repair, with notes on what we addressed on site.
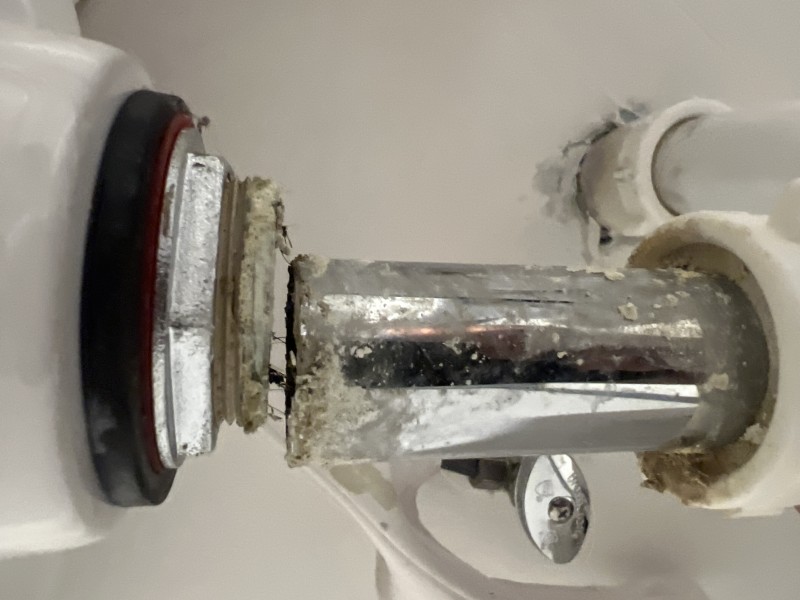
Initial Inspection & Leak Tracing
This image shows the underside of the bathroom sink where we inspected the P-trap, trap arm, and tailpiece. We followed moisture trails around the compression fittings and washers to pinpoint the source of the under-sink leak before disassembly.
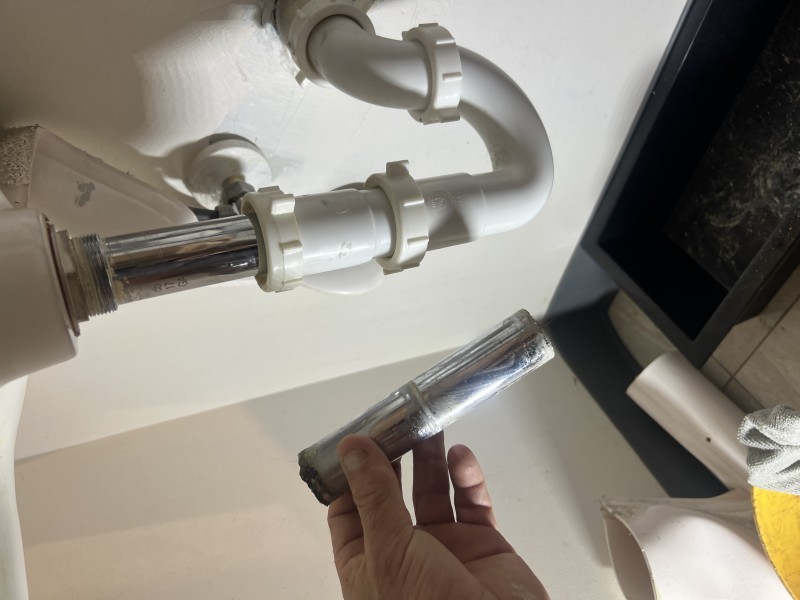
Component Replacement & Sealing
Here you can see the PVC P-trap and slip-joint connections during refit. We refreshed the slip washers, re-seated the trap adapter, and snugged the compression nuts. Appropriate use of thread seal tape and correct alignment help prevent future seepage.
Final Testing & Preventative Tips
This photo captures the post-repair check: we opened the angle stop valves, performed several fill-and-drain cycles, and inspected every joint under load. The trap union and trap adapter remained dry, confirming a successful leak repair and proper drain flow.