Kitchen Drain Leak Repair — Tampa, FL
This service call involved a hidden kitchen drain leak behind the sink cabinet. To fix it right the first time, we removed the sink, opened the back of the cabinet and drywall, repaired the leaking drain arm, replaced failed cast iron bands, and stubbed in clean drain and water lines before putting everything back together.
Working neatly in tight spaces is key. We used pro-grade tools—oscillating saw, pipe cutters, torque wrench for band clamps, and test plugs—to expose the damaged section, complete the cast iron to PVC transition, and pressure-test the system. The goal: a reliable, code-compliant repair with a watertight seal.
After confirming the leak was eliminated, we reinstalled the drywall and cabinet back panel, then reset the sink with new angle stops (shut-off valves) and braided stainless-steel supply lines. Everything was flushed, checked under load, and cleaned up—professional finish from start to end.
Completed in early November 2025, this Tampa kitchen repair showcases our expertise in leak detection, drain line repair, pipe replacement, and sink reinstallation using best-practice plumbing methods and durable materials.
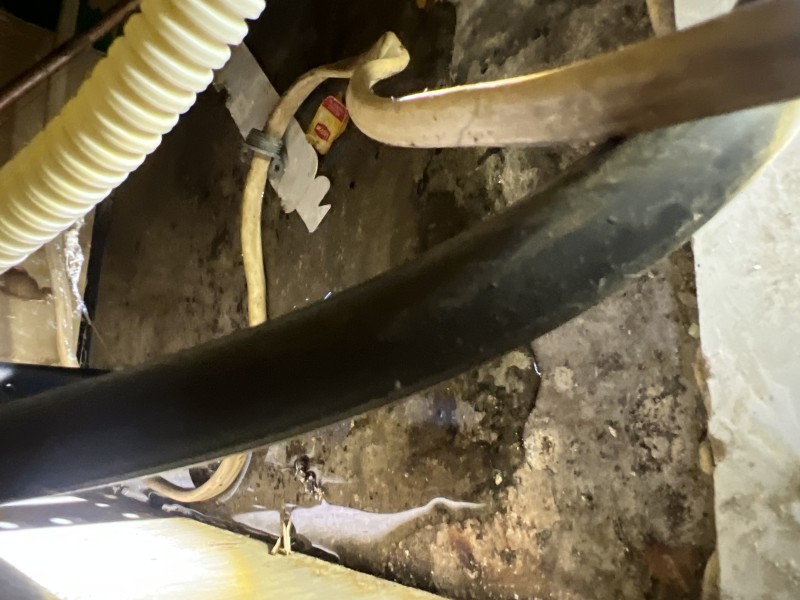
Accessing the Leak Point
I disconnected and removed the kitchen sink to access the cabinet’s back wall. This step allows safe cutting of the panel and drywall, proper leak detection, and a clean path to the drain arm and cast iron hub behind the box.

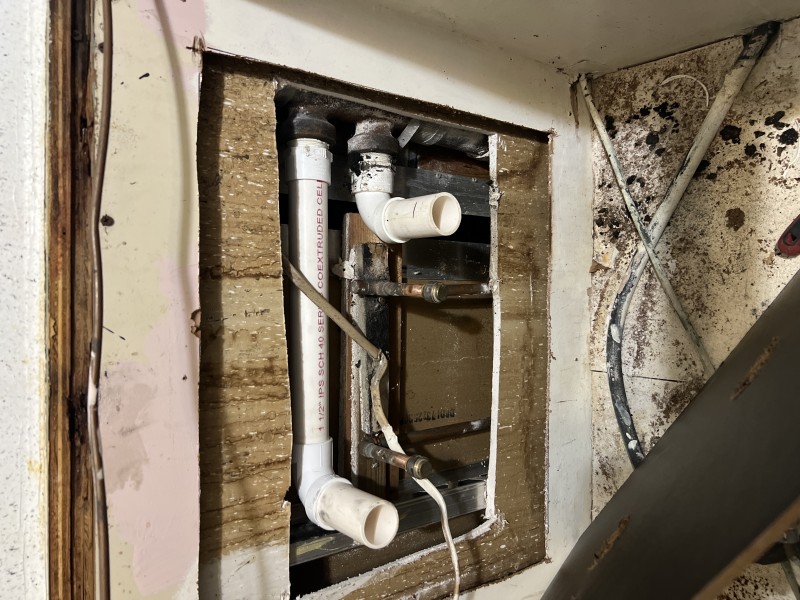
Opening the Cabinet & Drywall
Using an oscillating saw and drywall knife, I cut the cabinet back and drywall to expose the leaking joint. Careful demo minimizes dust and protects finishes while setting up a proper cast iron to PVC transition and repair bands.
Repairing the Drain Assembly
I removed the broken cast iron bands, replaced them with new heavy-duty repair bands, and fixed the drain arm. All connections were aligned, torqued to spec, and pressure-tested to verify a watertight seal.
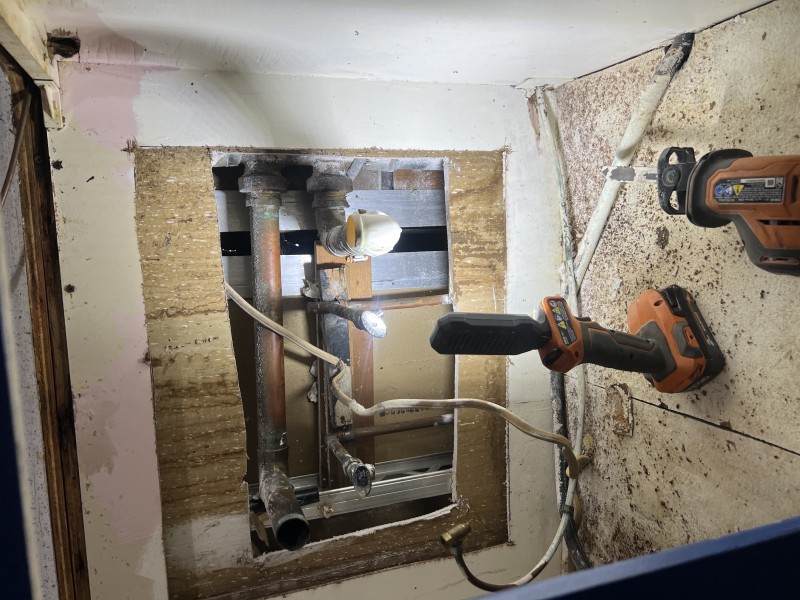
Stubbing New Lines
I stubbed new drain and water lines into the cabinet for a clean, code-compliant layout. This improves future serviceability and ensures smooth flow and reliable shutoff at the angle stops.
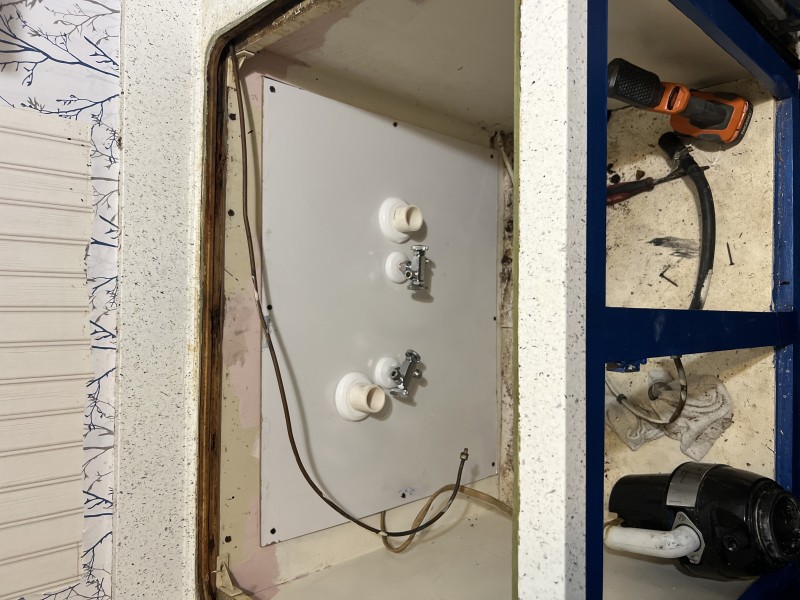
Reassembly & Final Testing
With drywall and cabinet back reset, I reinstalled the sink, added new shut-off valves and braided stainless-steel supply lines, then ran full-flow tests to confirm zero leaks and proper drain performance.