Professional Tub-to-Shower Conversion — Brandon, FL
In late May 2023, we completed a tub-to-shower conversion to modernize a bathroom and improve daily usability. After a detailed inspection of the existing water supply, drain line, and venting, we recommended a custom shower layout that would optimize space, safety, and long-term durability.
The project began with a careful demolition of the bathtub and surround, followed by framing and subfloor checks. Using a reciprocating saw, pipe wrenches, and pry bars, we disconnected the waste/overflow, capped hot and cold lines, and safeguarded the work area. This prep ensured a clean install, proper slope to the P-trap, and a waterproof foundation.
We then dry-fit and set a replacement acrylic shower base over a mortar bed for rigidity and sound dampening, aligning the drain with solvent-welded PVC and a compression gasket. A new pressure-balancing shower valve was installed to stabilize temperature, with copper and PEX transitions as needed. Every joint was pressure-tested to verify a leak-free system.
To finish, we installed moisture-resistant backer board, sealed seams, and mounted the wall system with silicone at all wet transitions. The end result is a low-maintenance, easy-access shower that drains efficiently, resists moisture intrusion, and elevates the bathroom’s look and function.
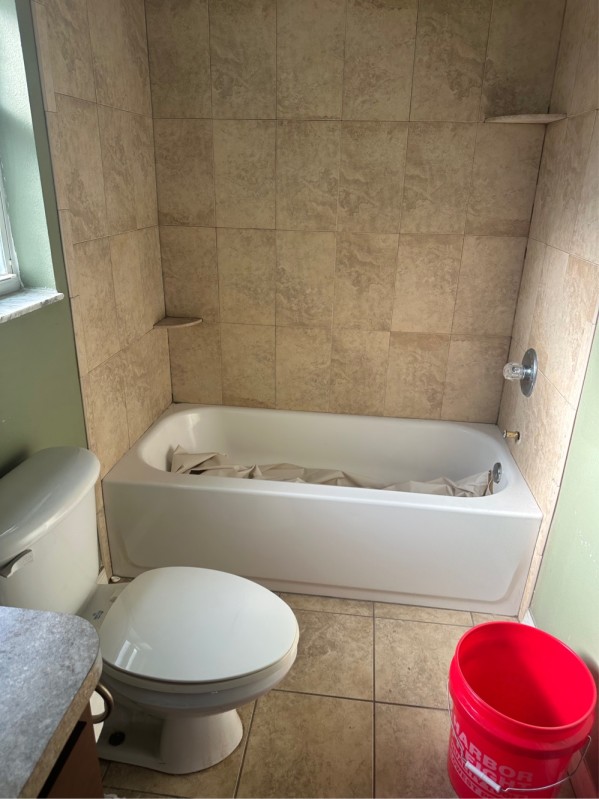
Demolition & Prep
Here I’ve removed the tub and surround, isolating the supply lines and capping them safely. Using a reciprocating saw and pry bars, I exposed the framing and waste/overflow to inspect the drain line, trap arm, and subfloor. Proper demo prevents hidden leaks and sets the stage for a clean, code-compliant installation.
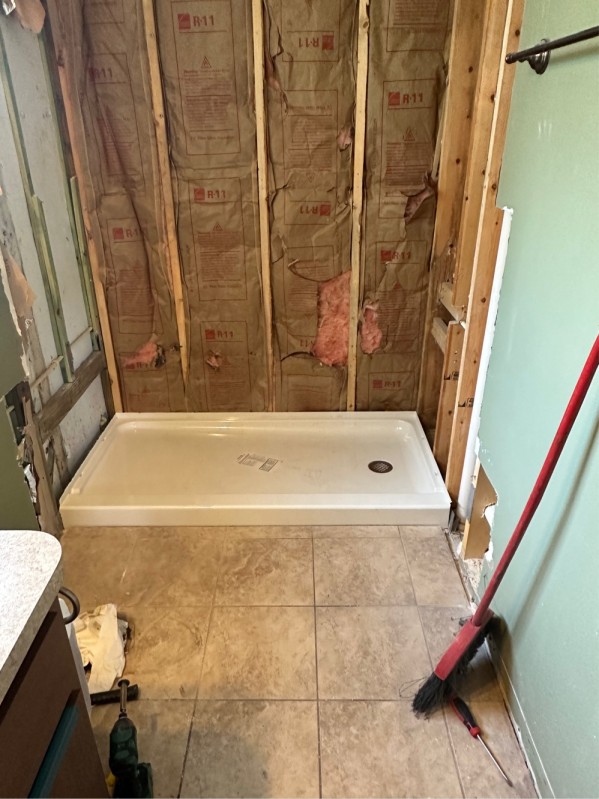
Base Dry-Fit & Leveling
The first base didn’t fit the alcove, so I sourced a correct-size acrylic shower pan. After dry-fitting, I set it in a mortar bed for full support, checked drain alignment, and verified slope to the P-trap. This step eliminates flexing, creaks, and future seal failures.
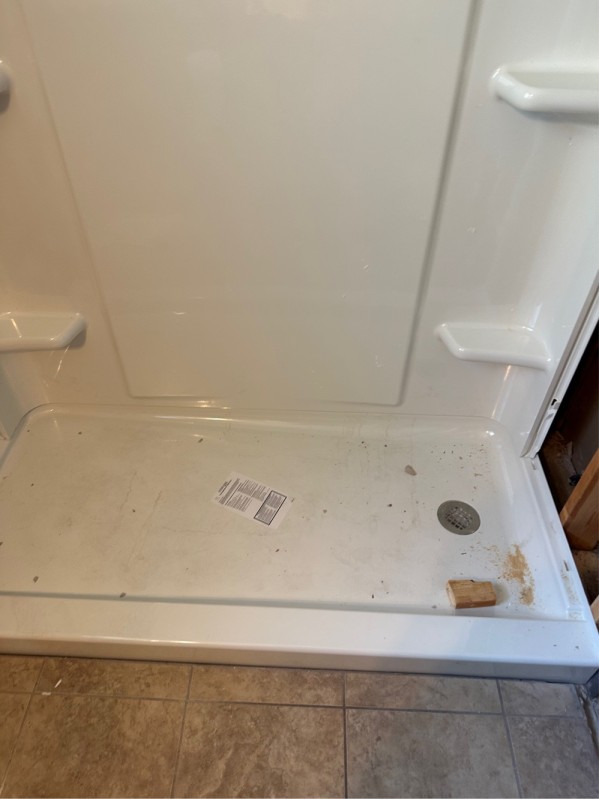
Valve Rough-In & Testing
I installed a new pressure-balancing shower valve and reworked the copper/PEX lines to meet code and ensure steady temperature. All connections were pressure-tested with gauges to confirm a tight system before closing the walls with moisture-resistant backer board.
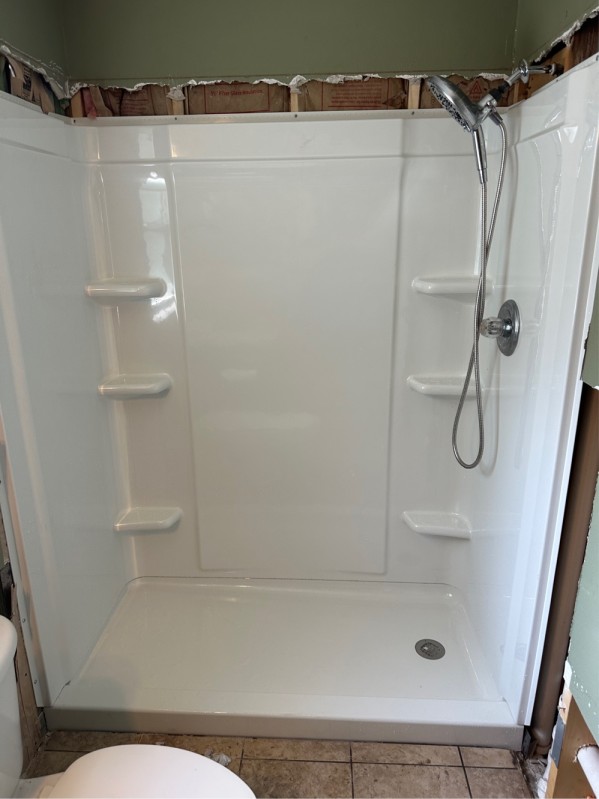
Sealing & Finishing Touches
After setting the wall system, I sealed all seams with high-grade 100% silicone, installed the trim kit and showerhead, and verified flow and drainage. The finished tub-to-shower conversion is waterproof, low-maintenance, and built for daily use.