Under-Sink Leak Repair & Slow Drain Fix — Orlando, FL (Recent Service Call)
When I arrived, the homeowner reported a slow-draining kitchen sink and moisture showing up inside the cabinet. I started with a visual inspection of the P-trap, tailpiece, and supply connections, then ran a quick flow test to confirm the symptom. Standing water and damp cabinet flooring usually point to a compromised seal, loose compression nut, or a hairline crack in the drain assembly.
After shutting off the angle stop valves, I disassembled the trap with a basin wrench and channel locks, checking each washer and ferrule. I found a worn compression ring that was allowing seepage whenever the sink drained under load. I also noticed partial blockage from soap scum and food debris. Using a hand auger, I cleared the line, then cleaned and re-seated all fittings for a tighter, leak-free connection.
For a durable fix, I replaced the faulty drain fitting, applied plumber’s tape on threaded joints, and confirmed proper slope on the trap arm to improve flow and reduce future buildup. With everything reassembled, I performed a fill-and-dump test to verify there were no drips under the sink and that the drain line now moved water quickly without gurgling or backup.
Addressing an under-sink leak promptly helps prevent cabinet damage and mold growth. If you notice persistent dampness, musty odors, or slow drainage, it’s best to schedule a professional evaluation. We handle leak detection, trap and tailpiece replacement, clog removal, and kitchen plumbing diagnostics across Orlando, FL.
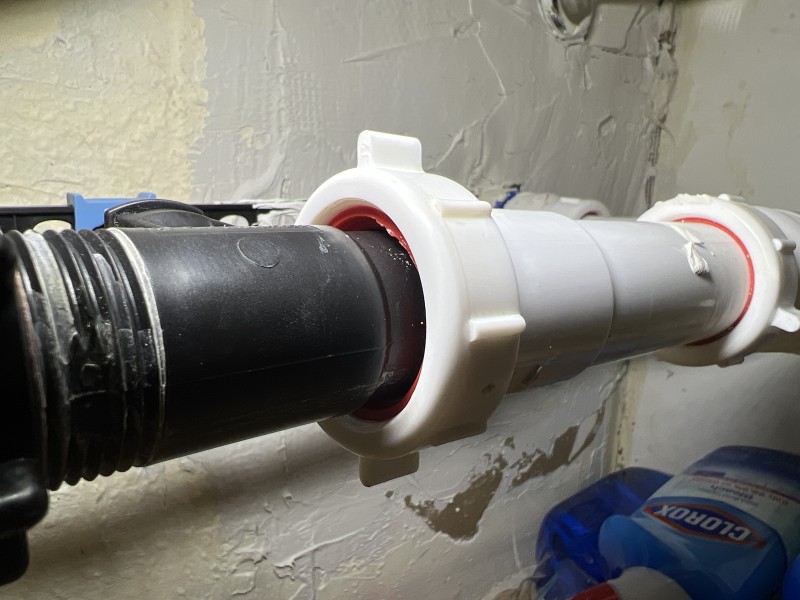
Initial Inspection & Diagnosis
Here I’m checking the P-trap, slip-joint washers, and compression nuts for signs of seepage. A quick flashlight inspection and paper-towel test around the trap arm and tailpiece help pinpoint a slow leak triggered when the basin drains.
Tools: flashlight, basin wrench, channel locks • Focus: leak detection, drain line assessment
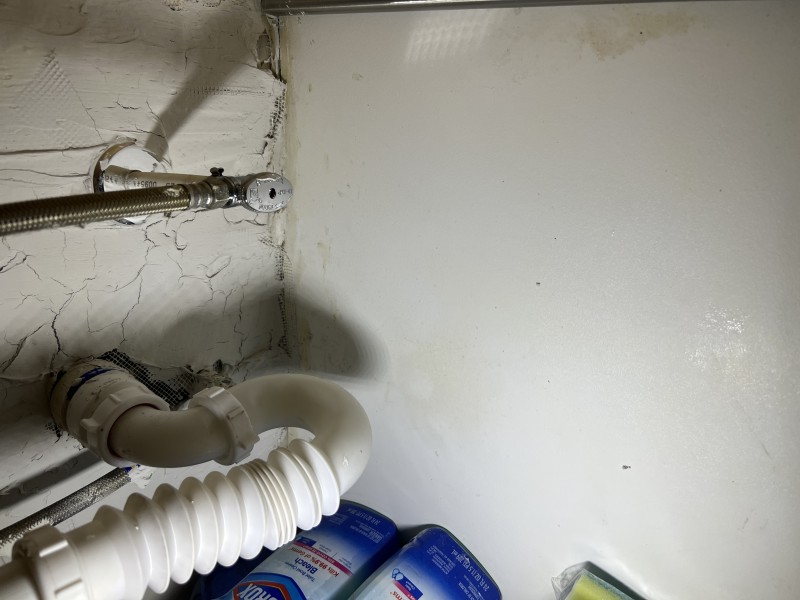
Repair: Fittings, Washers & Seal
I removed the worn compression ring, cleaned the mating surfaces, and installed a new washer set. After applying plumber’s tape on threaded joints, I reassembled the drain assembly and snugged the slip nuts to manufacturer-appropriate tightness.
Materials: compression ring, slip-joint washer, PTFE tape • Practice: proper sealing, drip prevention
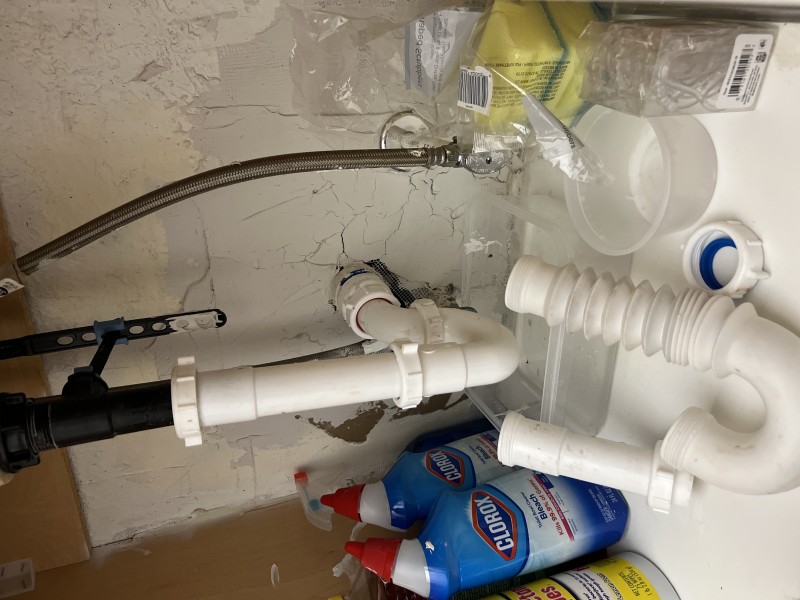
Clear Flow & Final Testing
With the hardware reset, I cleared minor debris using a hand auger and confirmed the line’s slope for optimal flow. A fill-and-dump test verified the slow-draining sink issue was resolved and the cabinet stayed completely dry.
Verification: pressure test, visual leak check • Outcome: restored drainage, leak-free operation